How to build a chatroom app with React and Firebase
This post was originally published on LogRocket.
In this tutorial, you’ll learn how to build a chatroom app in React using Firebase Cloud Firestore and Firebase Authentication. We’ll use a Firestore database to store the chatroom messages and allow users to sign in using Google sign-in from Firebase Authentication. We’ll even allow users to choose from multiple chatroom topics to chat about whatever they’re interested in.
Our finished project will look like the following gif:
The final project code can be found on GitHub. At the end of this tutorial, I’ll give you some ways to extend this application to further your React and Firebase skills. This tutorial assumes intermediate JavaScript, React, and CSS knowledge. You’ll need a Google account to access Firebase. If you don’t have a Google account, you can create one here.
Additionally, we’ll use React Router, a library for routing in React. Knowledge of this isn’t necessary, but you may want to give the documentation a glance on their website.
- What is Firebase Cloud Firestore?
- What is Firebase Authentication?
- Set up the Firebase project and React app
- Initialize Firebase
- Add Firebase Authentication
- Add
<UnauthenticatedApp>and<AuthenticatedApp>components - Implement
<UnauthenticatedApp> - Add chat rooms and routing
- Write chat room messages
- Read chat room messages
- Next steps
What is Firebase Cloud Firestore?
Firebase is a Google-built platform for developing applications. They provide products that help developers by speeding up development time, scaling quickly, and creating simple solutions for common development needs. The two Firebase products that we’ll use in this application are Cloud Firestore and Authentication.
Cloud Firestore is a cloud-hosted NoSQL database. Data are stored in documents as key-value pairs, and documents are organized into collections. Data are flexible and can be nested within documents and contain subcollections. Firestore databases scale automatically and synchronize data across listeners. In addition, they have a free tier, so they’re easy to use for experimentation and learning.
What is Firebase Authentication?
Authenticating users is non-trivial and something that you want to be done correctly. Thankfully, Firebase has done most of the hard work for us and implemented backend and sign-in solutions to make authentication easy. We’ll use Authentication’s simple SDK for authenticating users with sign-in methods such as email and password, Google sign-in, and phone number authentication.
Now that you’re familiar with Firebase, let’s start the project!
Set up the Firebase project and React app
To add Firebase to an application, we first need to create a Firebase project and register our Firebase app.
A Firebase project is a container for Firebase apps and its resources and services,like Firestore databases and Authentication providers. A Firebase app (i.e., the web app or iOS app) belongs to a project; a project can have many apps, and all of its apps share the same resources and services.
Navigate to the Firebase Console and follow the steps below to create a Firebase project:
- Click Create a project or Add project if you’ve used Firebase before
- Enter
Chat Roomas the project name, then click Continue - Toggle Enable Google Analytics for this project on or off; I chose to disable Google Analytics for simplicity
- Click Create project
The final step will create your Chat Room Firebase project and provision its resources. Once the resources are provisioned, click Continue to navigate to the project’s overview page.
Next, let’s create the Firebase app. Since we’re adding Firebase to a React app, we’ll need to create a web app. On the overview page:
- Click the web icon under Get started by adding Firebase to your app
- Enter
Chat Roomin the App nickname field - Click Register app
After the app is registered, you should see instructions for adding the Firebase SDK to your project under Add Firebase SDK:
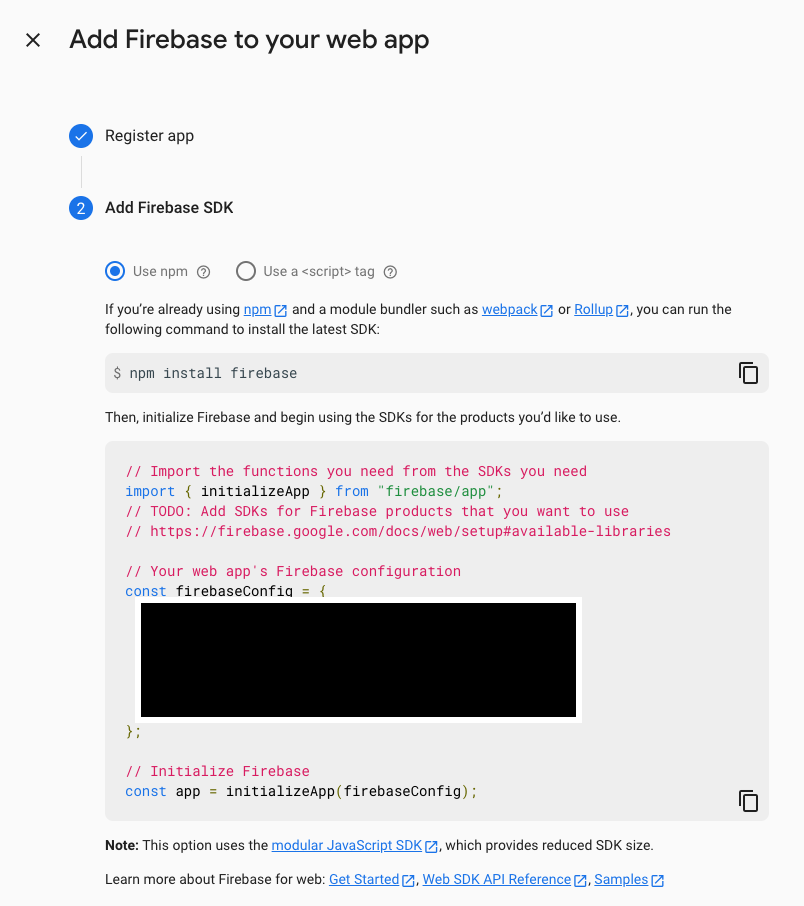
Keep this page open; we’ll come back to it in the next section to grab our Firebase configuration.
Next, let’s set up the React application and add the required dependencies. For simplicity, we’ll bootstrap our app with Create React App:
npx create-react-app chat-room && cd chat-room
Next, install the Firebase SDK, which gives us access to functions for Firebase Authentication and Cloud Firestore, and React Router:
npm i firebase react-router-dom
Initialize Firebase
With the React project set up and our Firebase app registered, we can now initialize Firebase in our project. Before going further, it’ll help to have an overview of how we’ll use the Firebase SDK within our application.
First, we’ll create a login function that uses Firebase Authentication to sign in a user via a Google sign-in. We’ll store the authenticated user in state and make this information and the login function available to components through the Context API. We’ll also use Firestore SDK functions to read from and write to our database. A custom hook that reads database messages will allow components to get the latest synchronized data.
With that in mind, the goal of this section is to initialize our Firebase app within React and set up the module to export our aforementioned functions that use the SDK.
First, create the directory and module file that initializes Firebase and exports our functions:
mkdir src/services && touch src/services/firebase.js
Next, we’ll add our Firebase configuration and initialize the application. The firebaseConfig object comes from the information that’s shown after you register your app under Add Firebase SDK:
import { initializeApp } from 'firebase/app';

const firebaseConfig = {
    // TODO: Add your Firebase configuration here
};

const app = initializeApp(firebaseConfig);
initializeApp returns a Firebase App instance, which allows our application to use common configuration and authentication across Firebase services. We’ll use this later when we set up Firestore.
That’s all we need to do to initialize Firebase within our application! Let’s move on to adding Firebase Authentication and our first React code.
Add Firebase Authentication
In this section, we’ll add Firebase Authentication to our app, create a function to log in as a user with Google, and set up the context that we briefly discussed in the previous section. We’ll create an <AuthProvider> component that passes down a user object and a login function. login wraps the SDK’s Google sign-in function and then sets the authenticated user in the state.
First, we need to enable Google as a sign-in method in the Firebase console. Navigate to the console, then:
- Click Authentication in the sidebar
- Click Get Started
- Click the Sign-in method tab at the top
- Under Sign-in providers, click Google
- Toggle Enable
- Select a Project support email
- Click Save
Next, we’ll add Firebase Authentication to our app. In src/services/firebase.js, add the following code:
// ...

import { GoogleAuthProvider, signInWithPopup, getAuth } from 'firebase/auth';

// ...

async function loginWithGoogle() {
    try {
        const provider = new GoogleAuthProvider();
        const auth = getAuth();

        const { user } = await signInWithPopup(auth, provider);

        return { uid: user.uid, displayName: user.displayName };
    } catch (error) {
        if (error.code !== 'auth/cancelled-popup-request') {
            console.error(error);
        }

        return null;
    }
}

export { loginWithGoogle };
Within the try block, we create a GoogleAuthProvider, which generates a credential for Google, and call getAuth, which returns a Firebase Authentication instance. We pass these two objects to signInWithPopup, which handles the sign-in flow in a popup and returns the authenticated user’s information once they’re authenticated. As you can see, this API makes a complex process fairly simple.
Firebase Authentication supports many other authentication methods; you can learn about them in the Firebase documentation.
Next, let’s create the authentication context and provider. Create a new directory for the context and a file to store it:
mkdir src/context && touch src/context/auth.js
Within src/context/auth.js, add the code below:
import React from 'react';
import { loginWithGoogle } from '../services/firebase';

const AuthContext = React.createContext();

const AuthProvider = (props) => {
    const [user, setUser] = React.useState(null);

    const login = async () => {
        const user = await loginWithGoogle();

        if (!user) {
            // TODO: Handle failed login
        }

        setUser(user);
    };

    const value = { user, login };

    return <AuthContext.Provider value={value} {...props} />;
};

export { AuthContext, AuthProvider };
We first create an AuthContext object and then an <AuthProvider> component to return the context’s provider. Within AuthProvider, we create our user state and a login function that calls our loginWithGoogle function and sets the user state once the user has signed in successfully. Finally, we make the user and login function available to context subscribers.
Next, we’ll create a custom useAuth hook to consume this context. We’ll use it within our root <App> component to check if we have a logged-in user in state. If we don’t, we can render a login page and have that page call the login function, also received via context. If we do, we’ll use the user information for sending and receiving messages.
Create a directory for our hooks and a file to store the new hook:
mkdir src/hooks && touch src/hooks/useAuth.js
Within src/hooks/useAuth.js, we’ll implement a simple hook that calls useContext to consume the context value that we created in src/context/auth.js:
import React from 'react';
import { AuthContext } from '../context/auth';

function useAuth() {
    const value = React.useContext(AuthContext);

    if (!value) {
        throw new Error("AuthContext's value is undefined.");
    }

    return value;
}

export { useAuth };
Finally, let’s make our context value available to the entire component tree by wrapping the <App> component with our <AuthProvider>. Add the following code to src/index.js:
// ...

import { AuthProvider } from './context/auth';

// ...

root.render(
    <AuthProvider>
        <App />
    </AuthProvider>
);

// ...
With the <AuthProvider> in place and our useAuth hook created, we’re ready to log in a user and receive their authenticated information throughout our application.
Add <UnauthenticatedApp> and <AuthenticatedApp> components
Previously, I mentioned that we’ll use our useAuth hook to determine if we should show a login screen or not. Within our <App> component, we’ll check if we have a user. If we do, we’ll render an <AuthenticatedApp>, which is the main app that users can chat in. If we don’t, we’ll render an <UnauthenticatedApp>, which is a page with a login button.
Here’s how the core of this logic looks:
function App() {
    const { user } = useAuth();
    return user ? <AuthenticatedApp /> : <UnauthenticatedApp />;
}
You can learn more about this authentication pattern on Kent C. Dodd’s blog.
Let’s start by creating these two components with a placeholder implementation. First, let’s create a components directory to store all of our components and directories and files for our two new components:
mkdir src/components src/components/AuthenticatedApp src/components/UnauthenticatedApp
touch src/components/AuthenticatedApp/index.jsx
touch src/components/UnauthenticatedApp/index.jsx src/components/UnauthenticatedApp/styles.css
In src/components/AuthenticatedApp/index.jsx, add a placeholder component:
function AuthenticatedApp() {
    return <div>I'm authenticated!</div>;
}

export { AuthenticatedApp };
Do the same in src/components/UnauthenticatedApp/index.jsx:
function UnauthenticatedApp() {
    return <div>I'm unauthenticated!</div>;
}

export { UnauthenticatedApp };
Now, in src/components/App.js, let’s do the authentication check described earlier, add a header, and set up our layout. Replace the default code with the following:
import { AuthenticatedApp } from './components/AuthenticatedApp';
import { UnauthenticatedApp } from './components/UnauthenticatedApp';
import { useAuth } from './hooks/useAuth';
import './App.css';

function App() {
    const { user } = useAuth();

    return (
        <div className="container">
            <h1>💬 Chat Room</h1>
            {user ? <AuthenticatedApp /> : <UnauthenticatedApp />}
        </div>
    );
}

export default App;
And in src/App.css, replace the default styles with these global styles:
* {
    box-sizing: border-box;
}

html {
    --color-background: hsl(216, 8%, 12%);
    --color-blue: hsl(208, 100%, 50%);
    --color-gray: hsl(210, 3%, 25%);
    --color-white: white;
    --border-radius: 5px;
    background-color: var(--color-background);
    color: var(--color-white);
}

html,
body,
#root {
    height: 100%;
}

h1,
h2,
h3,
h4,
ul {
    margin: 0;
}

a {
    color: inherit;
    text-decoration: none;
}

ul {
    padding: 0;
    list-style: none;
}

button {
    cursor: pointer;
}

input,
button {
    font-size: 1rem;
    color: inherit;
    border: none;
    border-radius: var(--border-radius);
}

.container {
    height: 100%;
    max-width: 600px;
    margin-left: auto;
    margin-right: auto;
    padding: 32px;
    display: flex;
    flex-direction: column;
    align-items: center;
    gap: 32px;
}
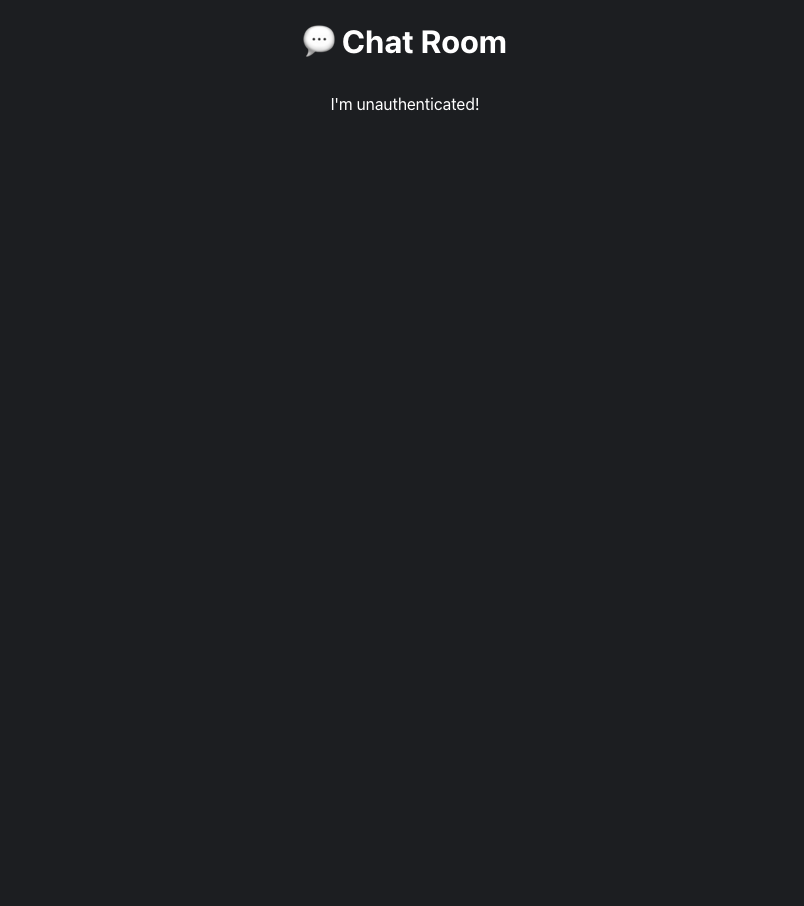
Finally, run yarn start and navigate to http://localhost:3000. Since user is initialized as null in our <AuthProvider>, you should see the text reading I'm unauthenticated!:
Implement <UnauthenticatedApp>
Now it’s time to wire everything together and add the login button to <UnauthenticatedApp>.
We’ve already done the hard part of writing the login function and passing it through context. Now, we can simply consume our AuthContext via useAuth to get the login function and render a button that calls it.
When the user clicks the login button, login is called which shows the Google sign-in popup. Once the login completes, the user will be stored in state which will show the <AuthenticatedApp>.
In src/components/UnauthenticatedApp/index.jsx, add the following code:
import { useAuth } from '../../hooks/useAuth';
import './styles.css';

function UnauthenticatedApp() {
    const { login } = useAuth();

    return (
        <>
            <h2>Log in to join a chat room!</h2>
            <div>
                <button onClick={login} className="login">
                    Login with Google
                </button>
            </div>
        </>
    );
}

export { UnauthenticatedApp };
And add the following styles to src/components/UnauthenticatedApp/styles.css:
.login {
    background: var(--color-blue);
    padding: 16px;
}
You can now navigate to your application in the browser and try logging in. Once you’re authenticated, you should see the text I'm authenticated!:

Congrats! We now have basic authentication in our application. Let’s continue by implementing the <AuthenticatedApp> component.
Add chat rooms and routing
Having the ability to chat with others is great, but it’d be more fun to chat with people about different topics. We’ll allow this by creating hardcoded chat room topics. In this section, we’ll create hardcoded chat rooms and set up routing so that we can have different routes for each room, i.e., /room/{roomId}.
First, create a file for our chatrooms:
mkdir src/data && touch src/data/chatRooms.js
In src/data/chatRooms.js, we’ll just export a chatRooms object with an id and title for each room:
const chatRooms = [
    { id: 'dogs', title: '🐶 Dogs 🐶' },
    { id: 'food', title: '🍔 Food 🍔' },
    { id: 'general', title: '💬 General 💬' },
    { id: 'news', title: '🗞 News 🗞' },
    { id: 'music', title: '🎹 Music 🎹' },
    { id: 'sports', title: '🏈 Sports 🏈' },
];

export { chatRooms };
These are the first topics that came to my mind, but this is your project––feel free to add whatever chat rooms interest you!
Next, let’s set up the router. <AuthenticatedApp> will render a router that contains two routes: one with path / that takes us to a <Landing> component, and another with the path /room/:id that renders a <ChatRoom> component.
First, let’s create files for our two new components and put placeholder components in them:
mkdir src/components/Landing src/components/ChatRoom
touch src/components/Landing/index.jsx src/components/Landing/styles.css
touch src/components/ChatRoom/index.jsx src/components/ChatRoom/styles.css
<Landing> will be responsible for listing all of our chatrooms. Clicking on one of them will navigate to /room/:id. Add a placeholder component in src/components/Landing/index.jsx:
function Landing() {
    return <div>Landing</div>;
}

export { Landing };
<ChatRoom> will list the messages of a room and render an input and button to send another message. In src/components/ChatRoom.index.jsx, add the code below:
function ChatRoom() {
    return <div>Chat room</div>;
}

export { ChatRoom };
Now, let’s set up the router in <AuthenticatedApp> and render the routes with our new components. Replace our placeholder implementation in src/components/AuthenticatedApp/index.jsx with the following code:
import { BrowserRouter, Routes, Route } from 'react-router-dom';
import { Landing } from '../Landing';
import { ChatRoom } from '../ChatRoom';

function AuthenticatedApp() {
    return (
        <BrowserRouter>
            <Routes>
                <Route path="/" element={<Landing />} />
                <Route path="/room/:id" element={<ChatRoom />} />
            </Routes>
        </BrowserRouter>
    );
}

export { AuthenticatedApp };
Discussing navigation with React Router is somewhat out of the scope of this article; if you’re interested in learning more about React Router, check out their documentation.
Let’s test our router by implementing <Landing> so that we can select a chat room. In <Landing>, we’ll simply create a React Router <Link> for each of our hardcoded chatRooms:
import { Link } from 'react-router-dom';
import { chatRooms } from '../../data/chatRooms';
import './styles.css';

function Landing() {
    return (
        <>
            <h2>Choose a Chat Room</h2>
            <ul className="chat-room-list">
                {chatRooms.map((room) => (
                    <li key={room.id}>
                        <Link to={`/room/${room.id}`}>{room.title}</Link>
                    </li>
                ))}
            </ul>
        </>
    );
}

export { Landing };
Let’s add some styles to src/components/Landing/styles.css to make things look nice:
.chat-room-list {
    display: flex;
    flex-wrap: wrap;
    gap: 8px;
}

.chat-room-list li {
    height: 100px;
    background: var(--color-gray);
    flex: 1 1 calc(50% - 4px);
    border-radius: var(--border-radius);
    display: flex;
    justify-content: center;
    align-items: center;
}
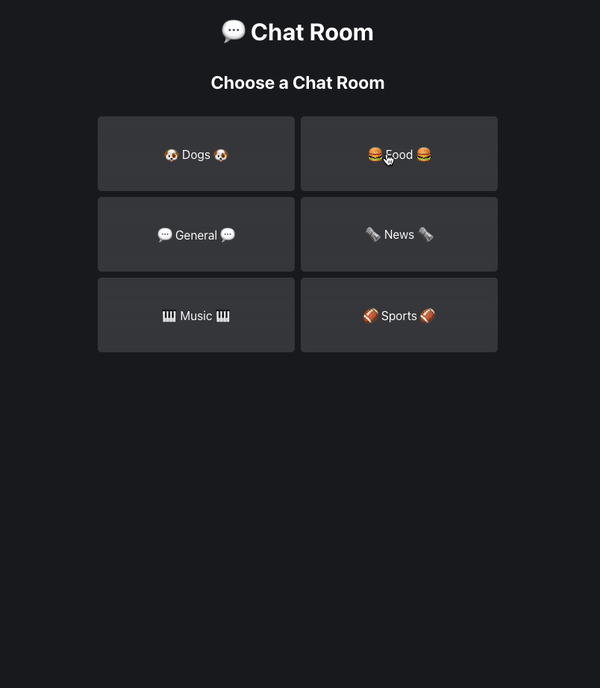
When you navigate to http://localhost:3000 and sign in, the router should take you to the updated <Landing> component:
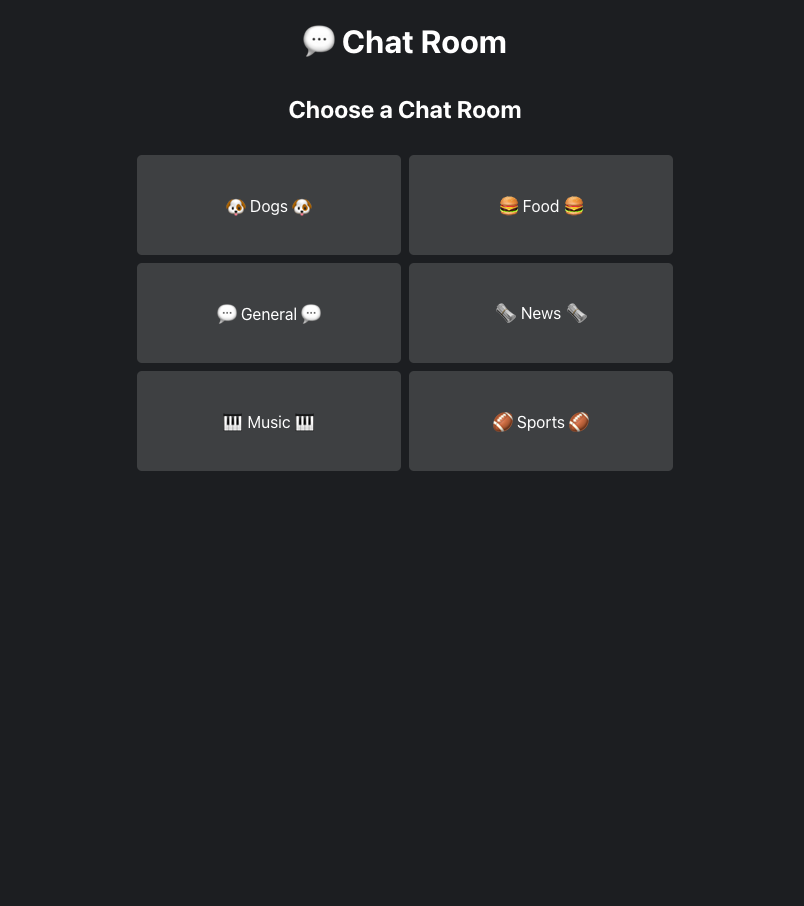
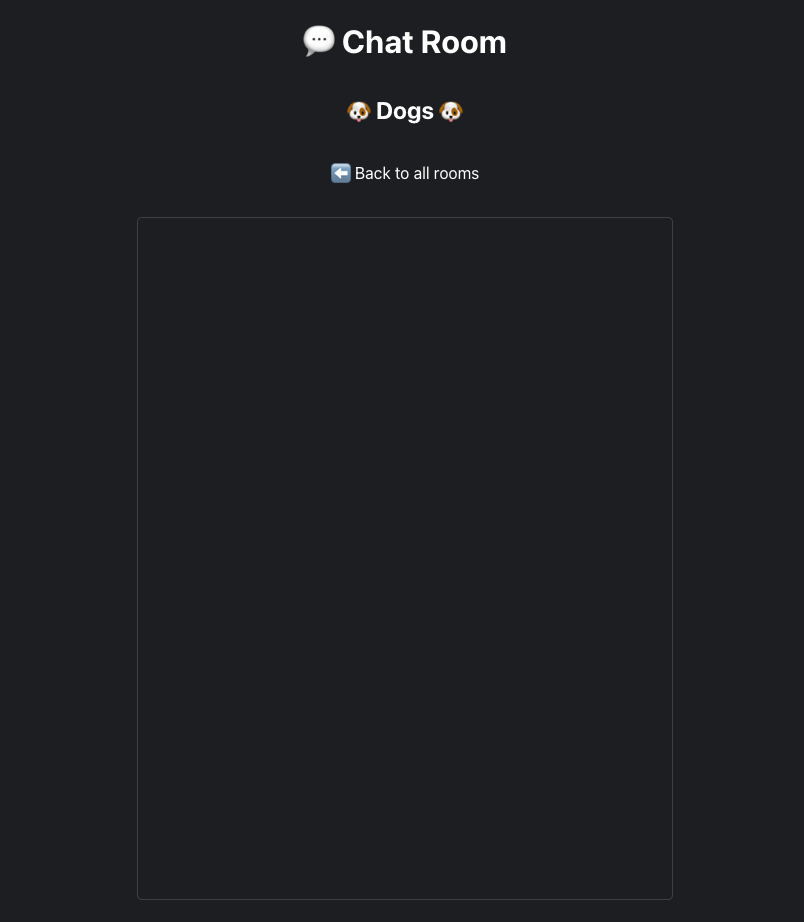
If you click on 🐶 Dogs 🐶,for instance, you should be taken to http://localhost:3000/room/dogs and see the text Chat room.
Lastly, let’s set up our <ChatRoom> component, which we’ll finish implementing later. For now, let’s display the chatroom information and provide a link back to the landing page:
import { Link, useParams } from 'react-router-dom';
import { chatRooms } from '../../data/chatRooms';
import './styles.css';

function ChatRoom() {
    const params = useParams();

    const room = chatRooms.find((x) => x.id === params.id);
    if (!room) {
        // TODO: 404
    }

    return (
        <>
            <h2>{room.title}</h2>
            <div>
                <Link to="/">⬅️ Back to all rooms</Link>
            </div>
            <div className="messages-container">{/* TODO */}</div>
        </>
    );
}

export { ChatRoom };
Recall that this component is rendered for the path /room/:id. With React Router’s useParams Hook, we can retrieve the ID in the URL and find the corresponding hardcoded chatroom.
Add the following styles to src/components/ChatRoom/styles.css:
.messages-container {
    width: 100%;
    padding: 16px;
    flex-grow: 1;
    border: 1px solid var(--color-gray);
    border-radius: var(--border-radius);
    overflow: hidden;
    display: flex;
    flex-direction: column;
}
If you navigate back to http://localhost:3000/room/dogs, you should see our updated component:
Write chat room messages
Now that we have pages for each of our chatrooms, let’s add the ability to send messages to a room.
First, we need to create a Firestore Database in the console:
- In the Firebase console, click the Chat Room project to go to its project overview page
- In the navigation menu, click Firestore Database
- Click Create database
- In the modal, under Secure rules for Cloud Firestore, click Start in test mode. This allows us to get started quickly without immediately worrying about setting up security rules. In test mode, anyone can read and overwrite our data; in production, you’d want to secure your database
- Click Next and select a Cloud Firestore location near to you
- Click Enable
After the Cloud Firestore database is provisioned, you should be taken to a page with the database data viewer:
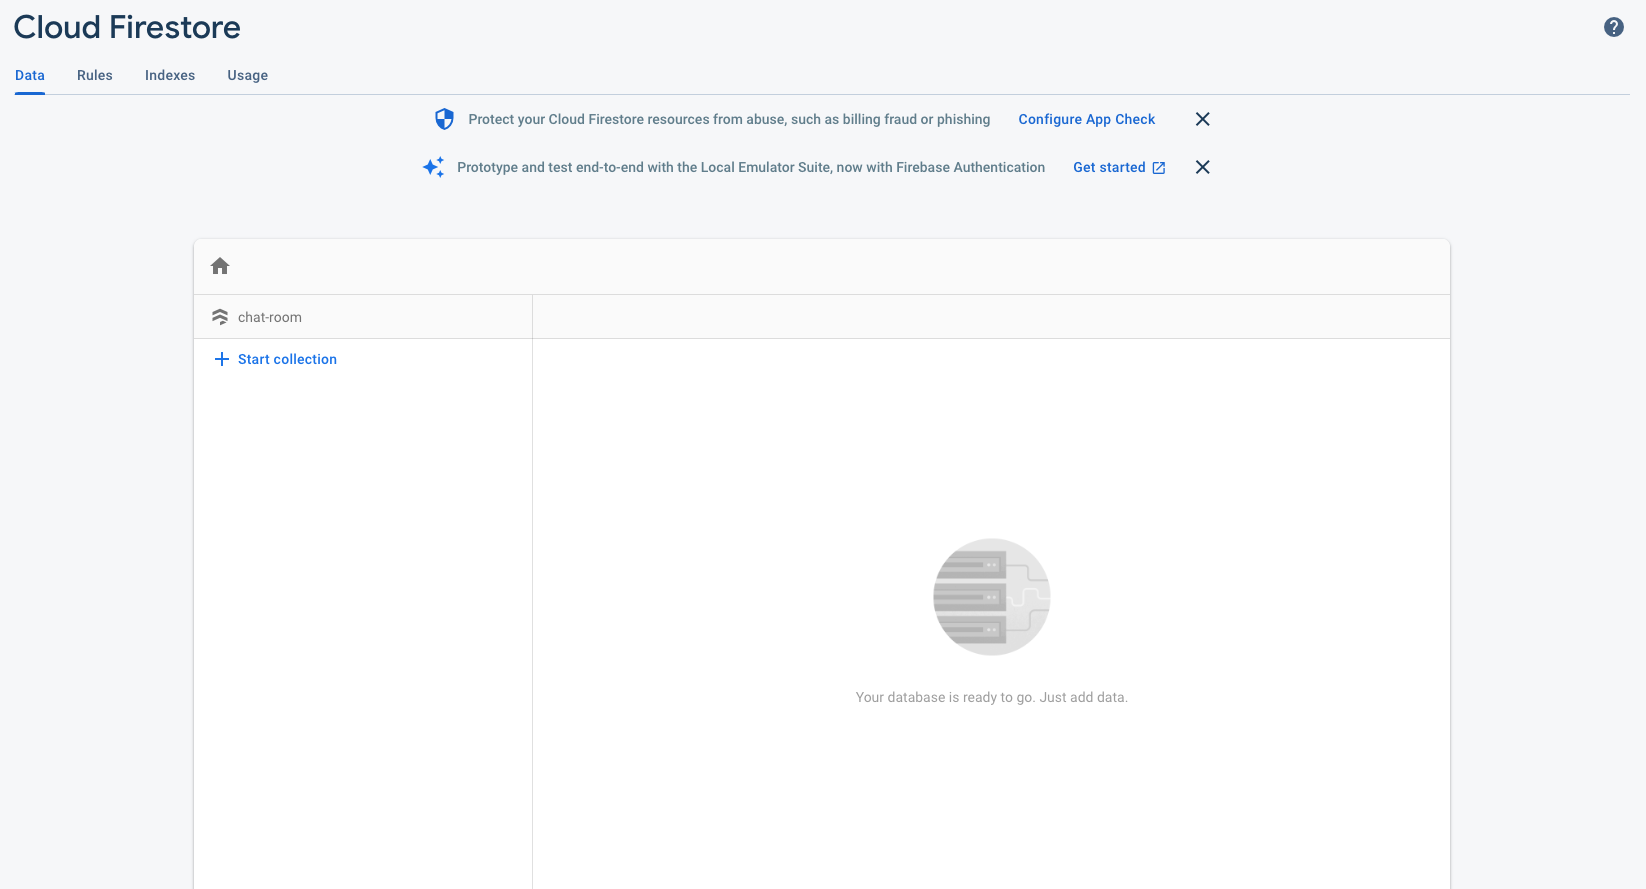
Once we add data, the data viewer will display the structure of our data and allow us to view, add, edit, and delete them.
Recall that Firestore data is stored in key-value documents, which are grouped into collections. Every document must belong to a collection. Documents are JSON-like; for example, a document for a dogs chatroom could be structured as follows:
[dogs]
name : "🐶 Dogs 🐶"
description : "A place to chat about dogs."
dateCreated : 2022-01-01
We could create multiple chatroom documents and store them in a chat-rooms collection:
[chat-rooms]

    [dogs]
    name : "🐶 Dogs 🐶"
    description : "A place to chat about dogs."
    dateCreated : 2022-01-01

    [general]
    name : "🍔 Food 🍔"
    description : "All things food."
    dateCreated : 2022-01-01

    ...
For our application, though, we’ll create a chat-rooms collection and a nested document for each room ID. Instead of storing the messages in each document as key-value pairs, we’ll create a messages subcollection for them. A subcollection is a collection associated with a document. Each messages subcollection will contain multiple message documents; the structure will look something like the following:
[chat-rooms]

    [dogs]
        [messages]
            [documentID]
            text : "..."
            timestamp : ...

    [general]
        [messages]
            [documentId]
            text : "..."
            timestamp : ...

    ...
To reference a document in our messages subcollection, for instance, we’d use the path chat-rooms/{roomId}/messages/{documentId}.
Note that we won’t use the data viewer to explicitly create these collections and documents. When we write to the database, Firestore will create a collection or document if it doesn’t already exist.
With this in mind, let’s create a sendMessage function that adds a document to a room’s messages subcollection. First, we need to initialize a Firestore instance in our app with getFirestore, which returns a reference to the Firestore service that we can use to perform reads and writes:
// ...

import { getFirestore } from 'firebase/firestore';

// ...

const app = initializeApp(firebaseConfig);
const db = getFirestore(app);

// ...
Next, we’ll use the addDoc and collection SDK functions to add documents. addDoc accepts a collection, which we obtain a reference to using collection, and a document object. collection takes the Firestore instance and arguments that form the path to the collection, which in our case is the messages subcollection.
Again, Firestore will create any collections and documents that don’t exist, so we can simply specify our desired path. addDoc will also create an ID for us:
// ...

import {
    getFirestore,
    collection,
    addDoc,
    serverTimestamp,
} from 'firebase/firestore';

// ...

async function sendMessage(roomId, user, text) {
    try {
        await addDoc(collection(db, 'chat-rooms', roomId, 'messages'), {
            uid: user.uid,
            displayName: user.displayName,
            text: text.trim(),
            timestamp: serverTimestamp(),
        });
    } catch (error) {
        console.error(error);
    }
}

export { loginWithGoogle, sendMessage };
Our sendMessage function takes in the roomId, current user, which is the object stored in context that we obtain using Authentication, and the message text. We use this data to form the document object passed as the second argument to addDoc.
We’re also using the serverTimestamp function for our timestamp property so that we can sort by message date when we retrieve messages. You can read more about this function in the documentation.
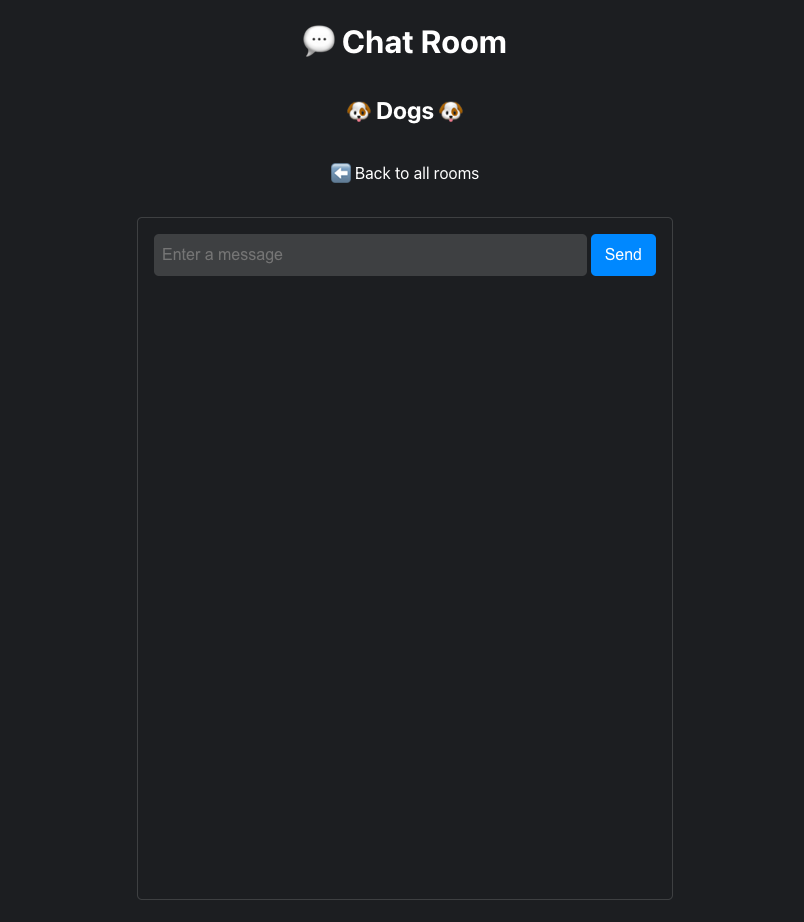
Now that we have a function that writes message data, we need an input component that calls it. We’ll create a <MessageInput> component that gets rendered at the bottom of our <ChatRoom> component. Create the component directory and files:
mkdir src/components/MessageInput
touch src/components/MessageInput/index.jsx src/components/MessageInput/styles.css
<MessageInput> will return a simple form with a text input and submit button. We’ll get the roomId from props and the user from context. When the form is submitted, we’ll call our sendMessage function with all the required information.
Add the following code to src/components/MessageInput/index.jsx:
import React from 'react';
import { useAuth } from '../../hooks/useAuth';
import { sendMessage } from '../../services/firebase';
import './styles.css';

function MessageInput({ roomId }) {
    const { user } = useAuth();
    const [value, setValue] = React.useState('');

    const handleChange = (event) => {
        setValue(event.target.value);
    };

    const handleSubmit = (event) => {
        event.preventDefault();
        sendMessage(roomId, user, value);
        setValue('');
    };

    return (
        <form onSubmit={handleSubmit} className="message-input-container">
            <input
                type="text"
                placeholder="Enter a message"
                value={value}
                onChange={handleChange}
                className="message-input"
                required
                minLength={1}
            />
            <button type="submit" disabled={value < 1} className="send-message">
                Send
            </button>
        </form>
    );
}

export { MessageInput };
And add the styles to src/components/MessageInput/styles.css:
.message-input-container {
    display: flex;
    gap: 4px;
}

.message-input {
    padding: 12px 8px;
    flex: 1;
    background: var(--color-gray);
    border-radius: var(--border-radius);
}

.send-message {
    padding: 12px 14px;
    background: var(--color-blue);
    border-radius: var(--border-radius);
    cursor: pointer;
}
Now we can render the component in <ChatRoom>:
// ...

import { MessageInput } from '../MessageInput';

// ...

function ChatRoom() {
    // ...
    return (
        <>
            <h2>{room.title}</h2>
            <div>
                <Link to="/">⬅️ Back to all rooms</Link>
            </div>
            <div className="messages-container">
                <MessageInput roomId={room.id} />
            </div>
        </>
    );
}

// ...
If you go back to http://localhost:3000/room/dogs, you should see the input:
Try entering a few messages and then go back to the data viewer in the Firebase console. You should see that a chat-rooms collection was created with the following structure:
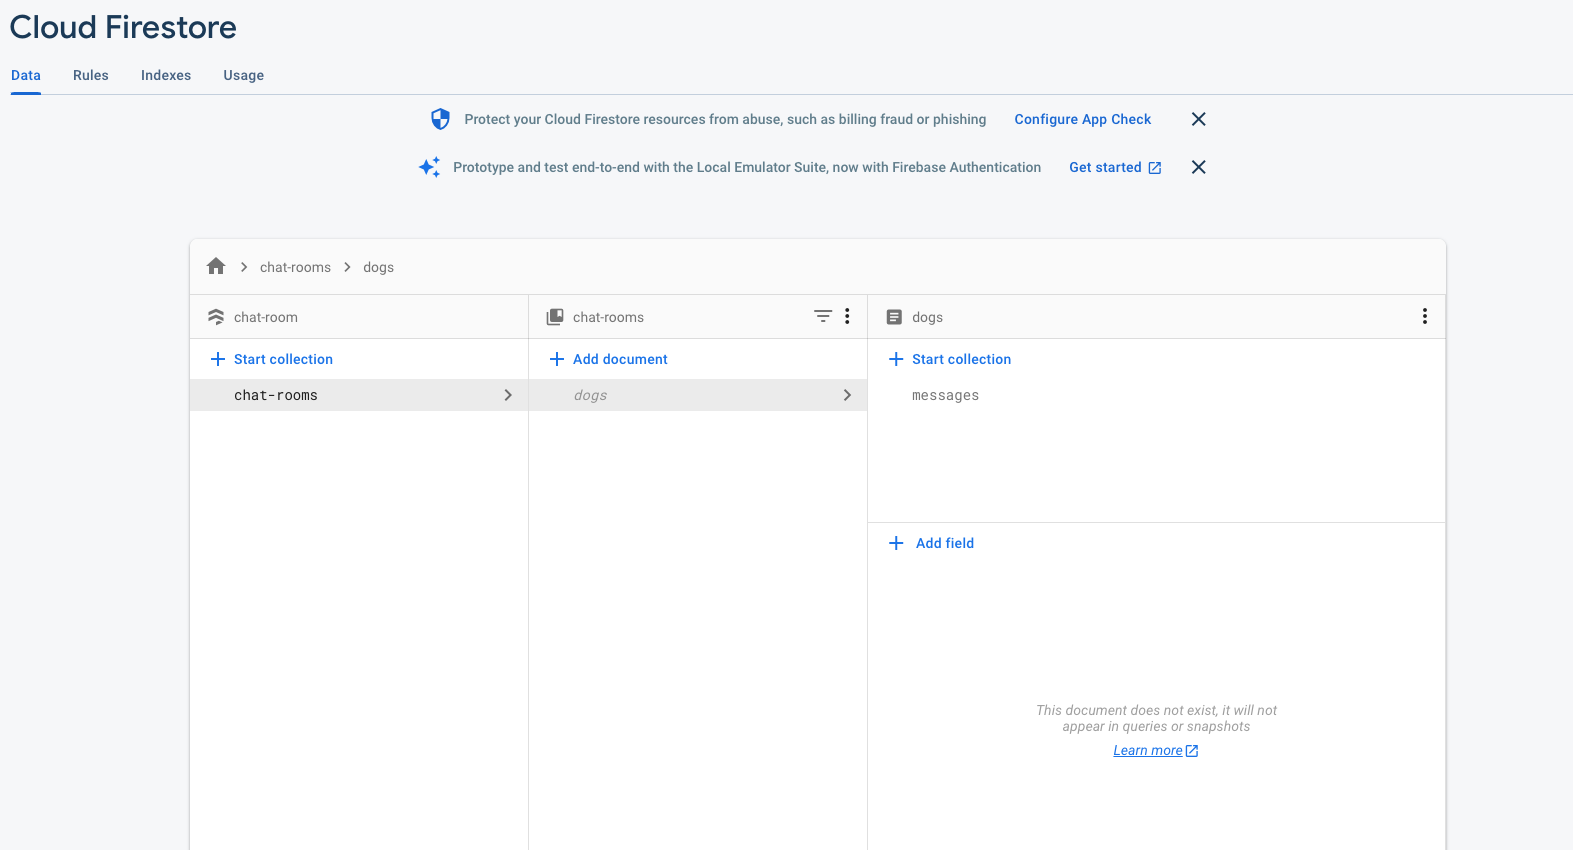
If you click into the messages subcollection, you’ll see documents for the messages you just created. Try adding messages in different chat rooms and notice how new documents are created for each room.
Read chat room messages
Now that we can write data to Firestore, the last thing we need to do is retrieve all of the chatroom’s messages. We’ll create a <MessageList> component that gets rendered inside of <ChatRoom> and lists all of the messages for a room. We’ll create a getMessages function for fetching room messages and a useMessages Hook that stores them in state.
Let’s start by creating getMessages. Update src/services/firebase.js with the code below:
// ...

import {
    getFirestore,
    collection,
    addDoc,
    serverTimestamp,
    onSnapshot,
    query,
    orderBy,
} from 'firebase/firestore';

// ...

function getMessages(roomId, callback) {
    return onSnapshot(
        query(
            collection(db, 'chat-rooms', roomId, 'messages'),
            orderBy('timestamp', 'asc')
        ),
        (querySnapshot) => {
            const messages = querySnapshot.docs.map((doc) => ({
                id: doc.id,
                ...doc.data(),
            }));
            callback(messages);
        }
    );
}

export { loginWithGoogle, sendMessage, getMessages };
The onSnapshot SDK function lets us take advantage of Firestore’s real-time updates. It listens to the result of a query and receives updates when a change is made.
We pass it a query that we construct using the query function. In our case, we want to listen to changes to a room’s messages subcollection and order the documents in ascending order by their timestamp.
The second argument we give it is a callback, which gets called when it receives the initial query and any subsequent updates, for example, when new documents are added. We form an array of messages by mapping each document, and then call the callback with the formatted messages. When we call getMessages in our Hook, we’ll pass a callback so that we can store the messages in state.
onSnapshot returns an unsubscribe function to detach the listener so that our callback isn’t called when it’s no longer needed; we’ll use this to clean up in our Hook.
First, create the useMessages Hook file:
touch src/hooks/useMessages.js
useMessages will accept a roomId, store messages in state, and return the messages. It’ll use an effect to fetch messages with getMessages, and unsubscribe the listener when the effect cleans up:
import React from 'react';
import { getMessages } from '../services/firebase';

function useMessages(roomId) {
    const [messages, setMessages] = React.useState([]);

    React.useEffect(() => {
        const unsubscribe = getMessages(roomId, setMessages);
        return unsubscribe;
    }, [roomId]);

    return messages;
}

export { useMessages };
Next, we’ll create the <MessageList> component to fetch and render messages for a room. Create a new component file for this component:
mkdir src/components/MessageList
touch src/components/MessageList/index.jsx src/components/MessageList/styles.css
<MessageList> will take the roomId as a prop, pass that to useMessages, then render the messages. Add the following code to src/components/MessageList/index.jsx:
import React from 'react';
import { useAuth } from '../../hooks/useAuth';
import { useMessages } from '../../hooks/useMessages';
import './styles.css';

function MessageList({ roomId }) {
    const containerRef = React.useRef(null);
    const { user } = useAuth();
    const messages = useMessages(roomId);

    React.useLayoutEffect(() => {
        if (containerRef.current) {
            containerRef.current.scrollTop = containerRef.current.scrollHeight;
        }
    });

    return (
        <div className="message-list-container" ref={containerRef}>
            <ul className="message-list">
                {messages.map((x) => (
                    <Message
                        key={x.id}
                        message={x}
                        isOwnMessage={x.uid === user.uid}
                    />
                ))}
            </ul>
        </div>
    );
}

function Message({ message, isOwnMessage }) {
    const { displayName, text } = message;
    return (
        <li className={['message', isOwnMessage && 'own-message'].join(' ')}>
            <h4 className="sender">{isOwnMessage ? 'You' : displayName}</h4>
            <div>{text}</div>
        </li>
    );
}

export { MessageList };
The logic in the layout effect causes the container to scroll to the bottom so that we’re always seeing the most recent message.
Add styles to src/components/MessageList/styles.css:
.message-list-container {
    margin-bottom: 16px;
    flex: 1;
    overflow: scroll;
}

.message-list {
    height: 100%;
    display: flex;
    flex-direction: column;
    align-items: flex-start;
}

.message {
    padding: 8px 16px;
    margin-bottom: 8px;
    background: var(--color-gray);
    border-radius: var(--border-radius);
    text-align: left;
}

.own-message {
    background: var(--color-blue);
    align-self: flex-end;
    text-align: right;
}

.sender {
    margin-bottom: 8px;
}
Finally, render the component in <ChatRoom> above the <MessageInput> we added earlier:
// ...

import { MessageList } from '../MessageList';

// ...

function ChatRoom() {
    // ...
    return (
        <>
            <h2>{room.title}</h2>
            <div>
                <Link to="/">⬅️ Back to all rooms</Link>
            </div>
            <div className="messages-container">
                <MessageList roomId={room.id} />
                <MessageInput roomId={room.id} />
            </div>
        </>
    );
}

// ...
Congrats, you now have a working chatroom app built with React and Firebase! You can view the final code on GitHub.
Next steps
A great way to learn is to take a project and modify it or add more features. Here are a few ideas of ways you can extend this project:
- Secure the Firestore database
- Add support for different authentication methods
- Store chat rooms in Firestore instead of in code
- Allow users to add their own chat rooms
- Let users sign out
- Only show chat messages from the last minute when entering a chat room
- Show a message when a user enters or leaves a chat room
- Display user avatars
- Show all users in a chatroom
- Randomly assign message colors to users
Conclusion
In this tutorial, you learned how to build a simple chatroom app with Firebase. You learned how to create a Firebase project and add it to a React application, and authenticate users using Firebase Authentication’s Google sign-in method. You then learned how to use the addDoc API to write to a Firestore database and the onSnapshot API to listen to real-time updates.
If you’re interested in learning more about Firebase, you can read their documentation here.
Let's connect
Come connect with me on LinkedIn, Twitter, and GitHub!
If you found this post helpful, please consider supporting my work financially:
☕️Buy me a coffee!